Planking the deck
The deck planking is cut from two sheets of Sapele plywood, which is the same species of Mahogany I used for the frames.

After deciding which way to position the panels to find the grain pattern I liked the most, I traced the outline and cut the pieces a few inches over size with a jigsaw.

I then coated the plywood pieces with an epoxy sealer coat on both sides for waterproofing. Fortunately, I was able to convince my wife to let me use the den for a couple of days for epoxy coating (it’s getting too cold here to epoxy outside most nights). The epoxy is pretty odor free and hardens pretty quickly so it just took two nights.

Sapele has very dramatic grain with lots of waves and concentric patterns. It looks like a topographic map. The Sapele was darker than I expected after I coated it in epoxy, but I think it will look good with the white hull.
I’m running out of days this year that will be warm enough to use epoxy. There are two days coming up where it will be above 50° overnight, so I rushed to seal the decking so I could install it and fiberglass it this season to protect the plywood.
The decking is installed with epoxy glue at all points it contacts the frames, including the carlings, sheer clamps, frames, beams, and deck battens and strong back. That is a lot of opportunities to drip glue on the paint, so I completely covered the inside of the hull with moving blankets and the outside with plastic sheathing.

In addition to the epoxy glue, the plywood decking is also fastened with 1” silicon bronze ringed nails every 2” along the outside and every 4” on the inside (i.e. a LOT of nails). I pre-drilled all of the nail holes so I wouldn’t split the wood.

It took a few hours, but I installed all of the decking in one night.

This left one more day warm enough to epoxy, which I used to fiberglass the deck. I rolled out and trimmed the fiberglass cloth to size and then smoothed it with the hand broom from my dust pan.

Then I wet out the cloth. This is just pouring epoxy on the fiberglass cloth and spreading it around with a plastic squeegee. This has the really cool effect of turning the fiberglass cloth from an opaque white to clear. The photo below is in the middle of wetting out the starboard front deck. It shows the sealed plywood without fiberglass on the right, the wet out glass on the lower left, and the dry glass in the upper left.
It is pretty easy to wet out the fiberglass cloth; the main things to watch out for are trapped air (working from the inside out helps) and too little or too much epoxy. I didn’t get it perfect (the shiny spots are too much epoxy and the white spots are too little) but it should still be plenty strong and look great once I fill it. Filling the fiberglass cloth will take two more coats of epoxy to hide the weave of the cloth and create a high gloss finish, but those probably have to wait until spring.

The picture below is before wetting out the port deck and shows what the dry fiberglass cloth looks like on the right (port side of the boat), and after the first coat of epoxy on the left side of the picture / starboard side of the boat:

I wet out both sides of the deck in the same night.

I gave the epoxy a couple of days to dry, then trimmed the decking to final size. I made a tool for a paddle board I previously built specifically for tracing an outline from the bottom to the top of the decking that I used here. It is simple but effective:

The gap is 6mm thick to fit around the decking and the point of the pencil is even with the end of the lower tong, so the pencil copies whatever line the lower piece follows onto the top of the decking - in this case the hull. I then just followed just outside the line with a jig saw to trim the decking to the hull and cleaned it up with a hand plane to make it flush.
I made a giant compass to make the front of the cockpit a nice smooth semicircle that blends into the sides.
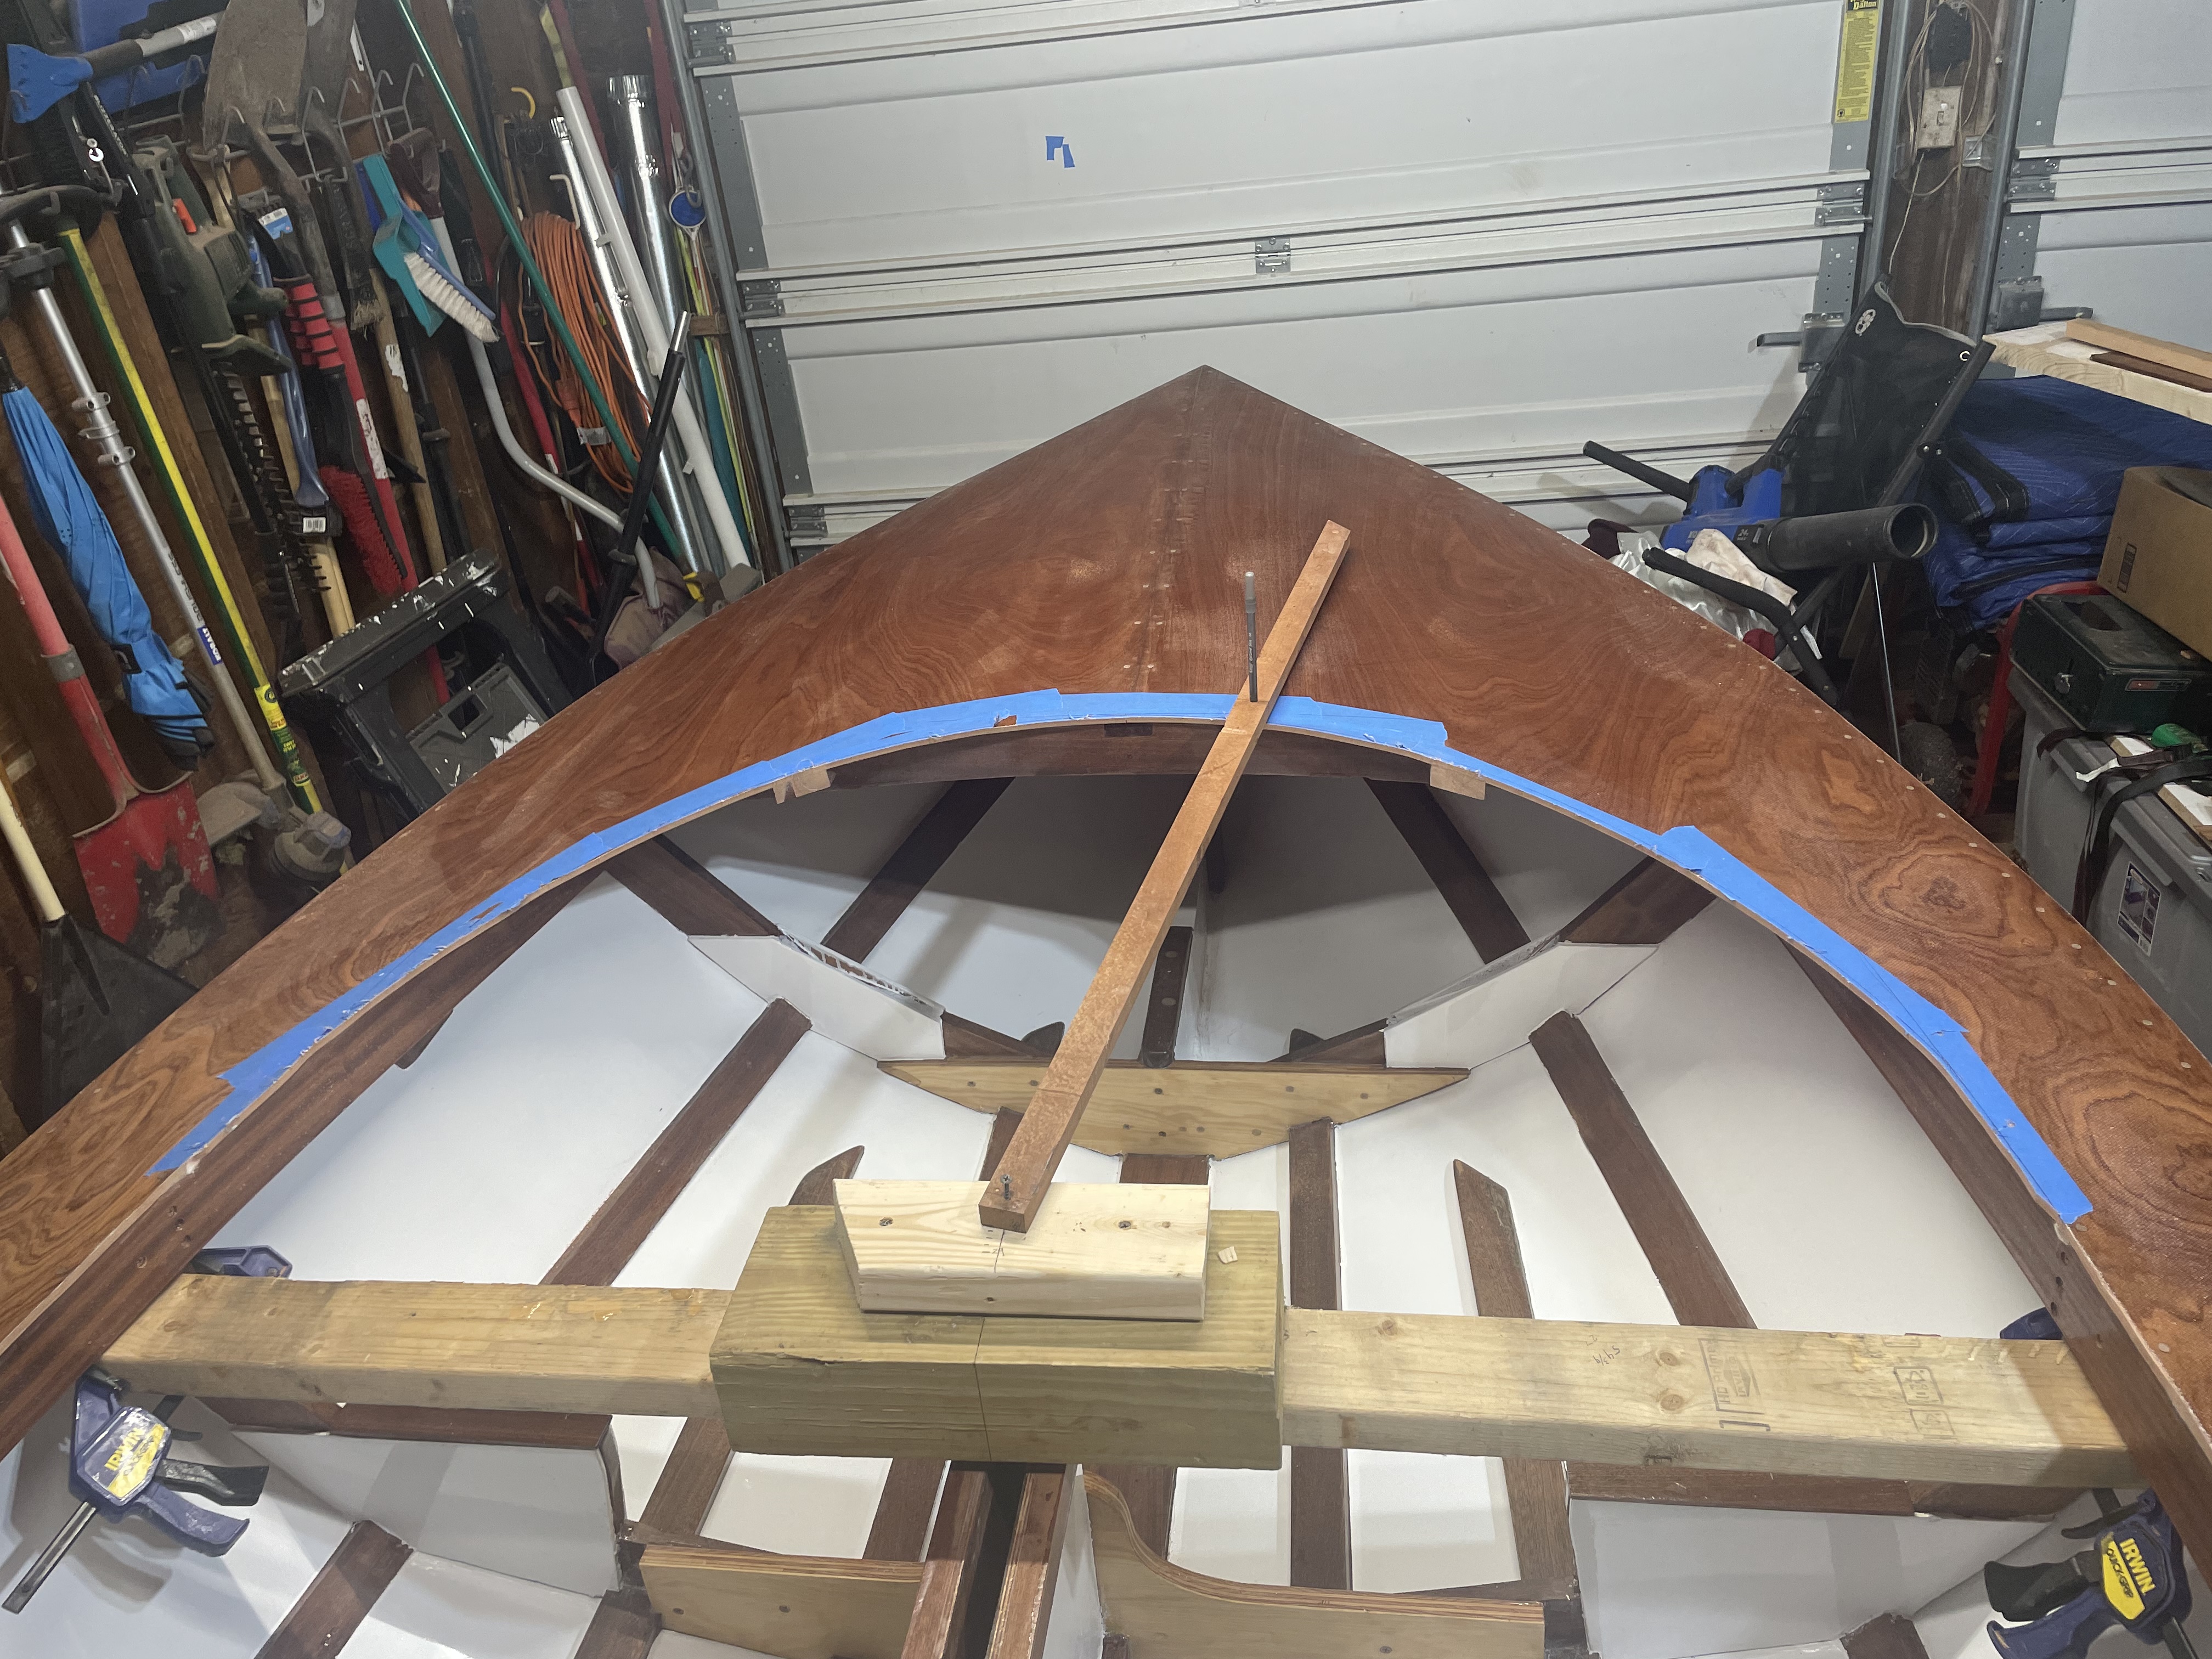
I haven’t decided if I want to cut the semicircle out freehand with the jig saw following the line, or attach my router to compass.
After I trim the deck to final shape, next step is to build up the front edge of the cockpit to 1” thick so I can mount the coaming (a 1/4” thick trim piece inside the coaming), deck trim, and rub rail.


Comments
Post a Comment